New to SWAPP mapping? This beginner guide walks you through the basics of creating outreach territories and maps step by step. By the end, you'll know how to set up folders, draw territories on the map, and add individual street maps inside them.
Creating a Folder (Territory)
Step 1: Add a Folder
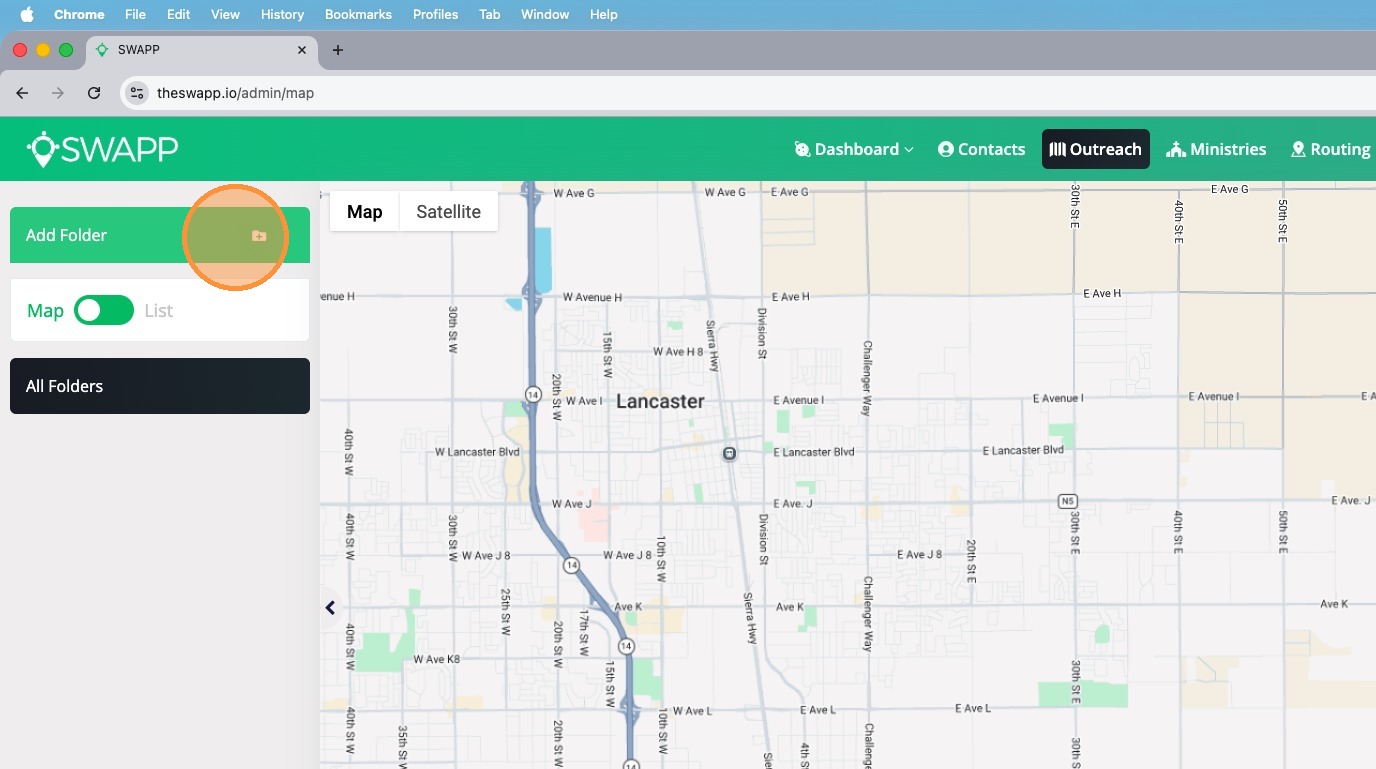
To begin creating maps, the first thing you need to do is create a folder or a territory. Do that by clicking on Add a Folder.
Step 2: Draw the Territory

Start drawing the territory on the map by clicking to drop anchor points. Each click places a new point, and the area between them forms the boundary of your territory.
Step 3: Close the Territory
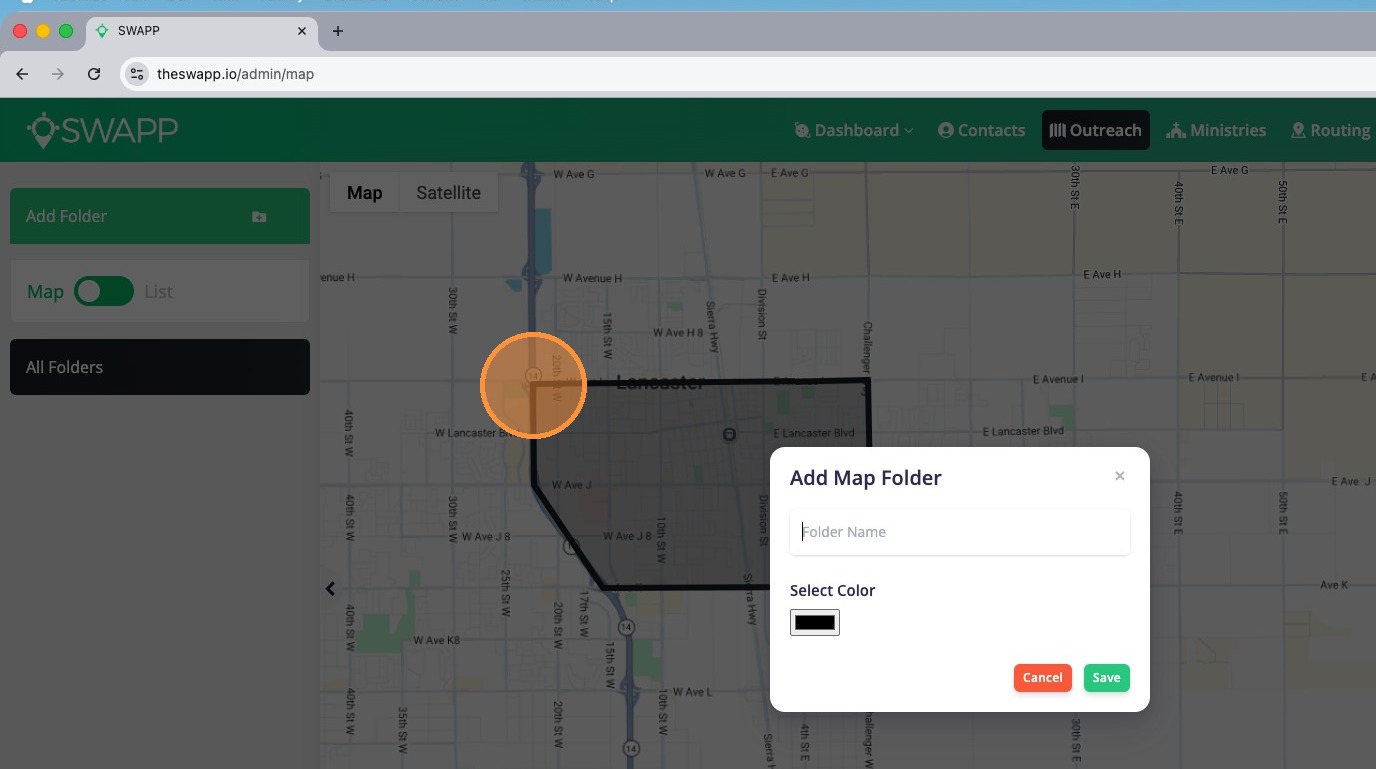
To finish drawing the territory, come full circle back to the first anchor point and click on that anchor point again. This closes the shape and completes your territory boundary.
Step 4: Name the Folder
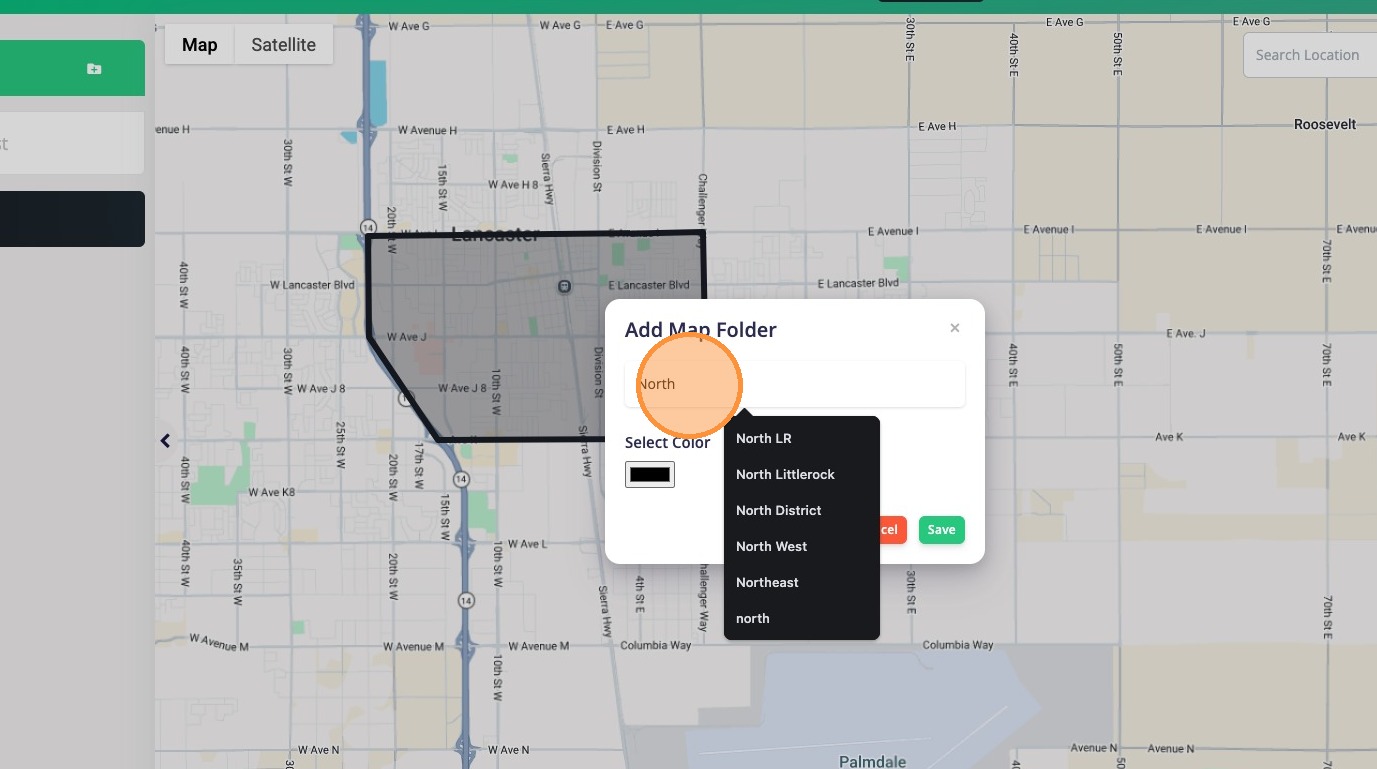
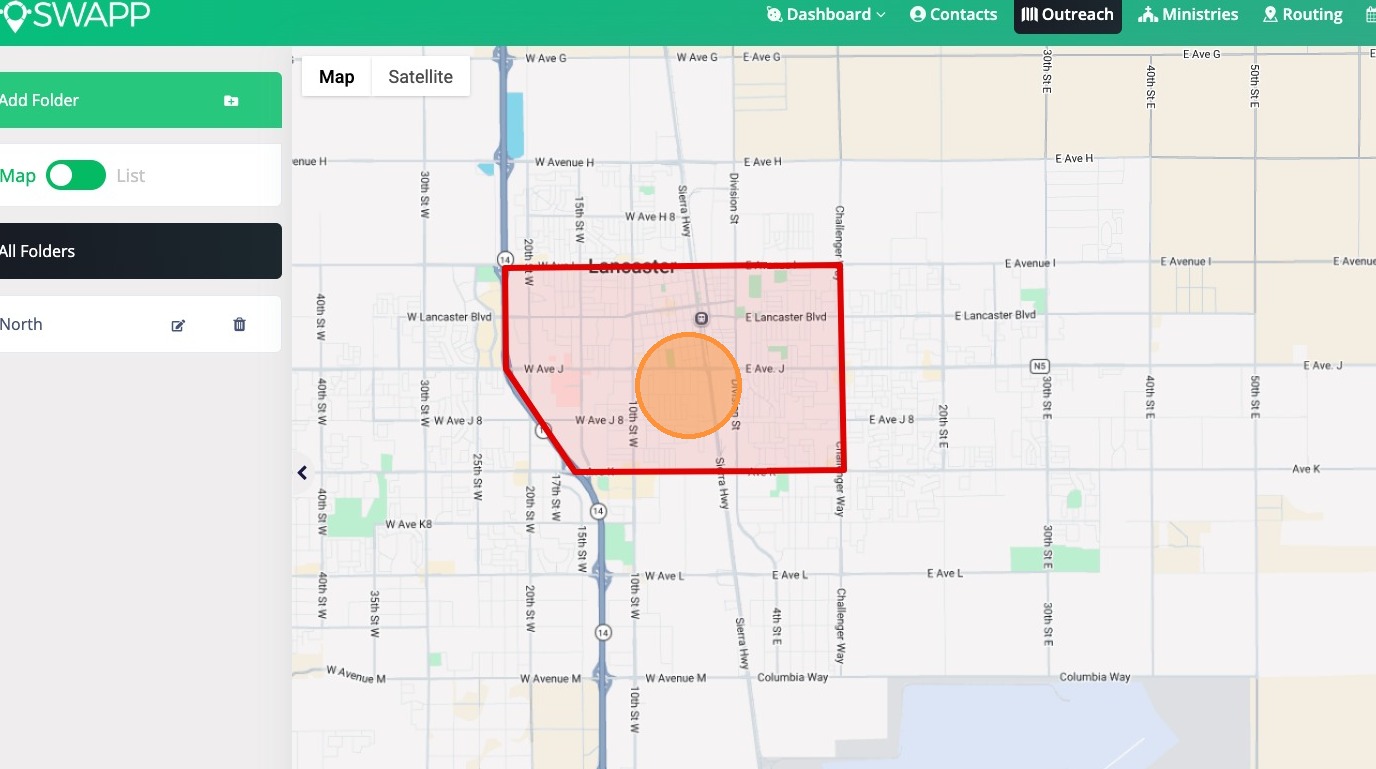
You will be prompted to give the folder or territory a name. In this example, we'll name the folder "North" and hit save.
Adding Maps Inside a Folder
Step 5: Open the Folder
To start putting maps inside that folder, click on it — either by clicking on the territory area on the map or selecting it from the list on the left side.
Step 6: Click Add a Map
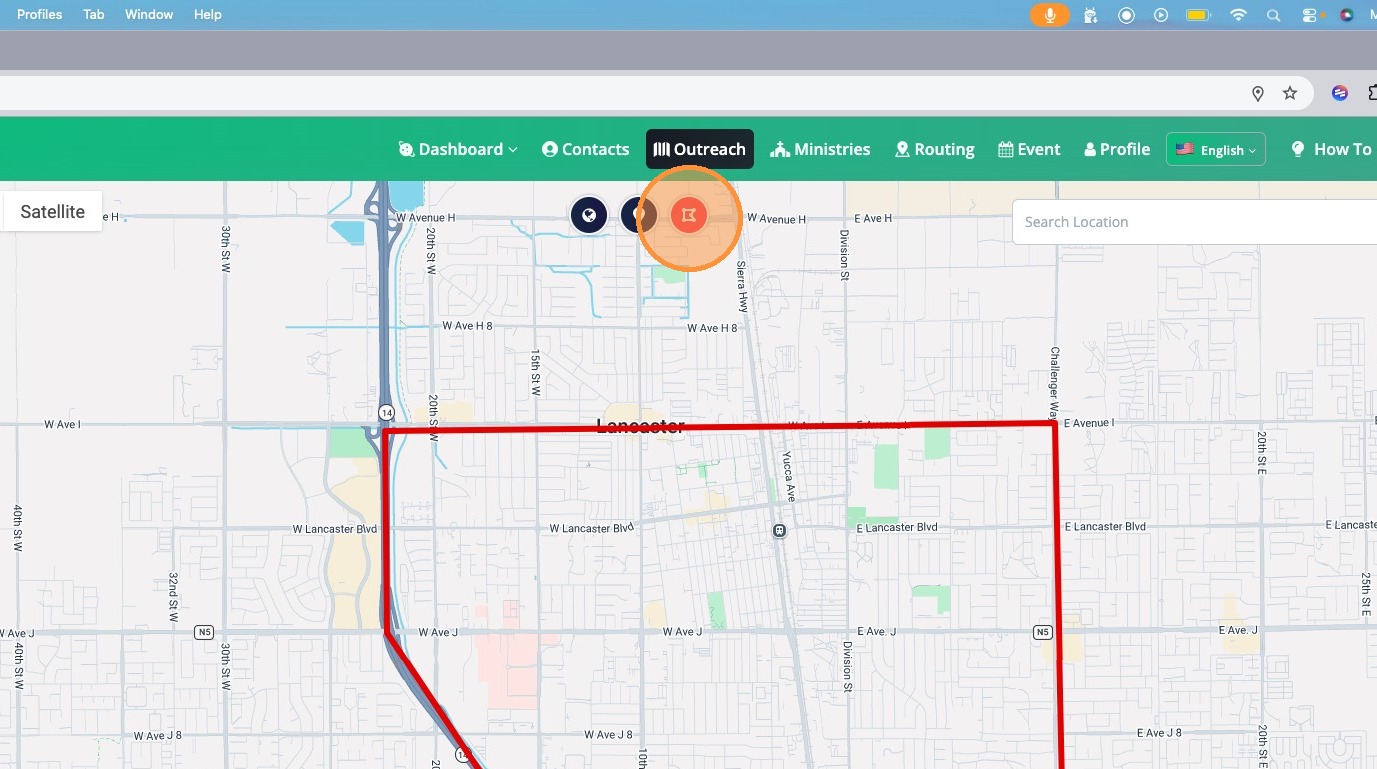
You will see three new icons appear at the top center of the map. Click on Add a Map to begin creating a new map inside this folder.
Step 7: Draw the Map Along a Street

Zoom into the street where you want to create a map. Click along the street to drop anchor points where needed, tracing the path you want to map.
Step 8: Complete the Map
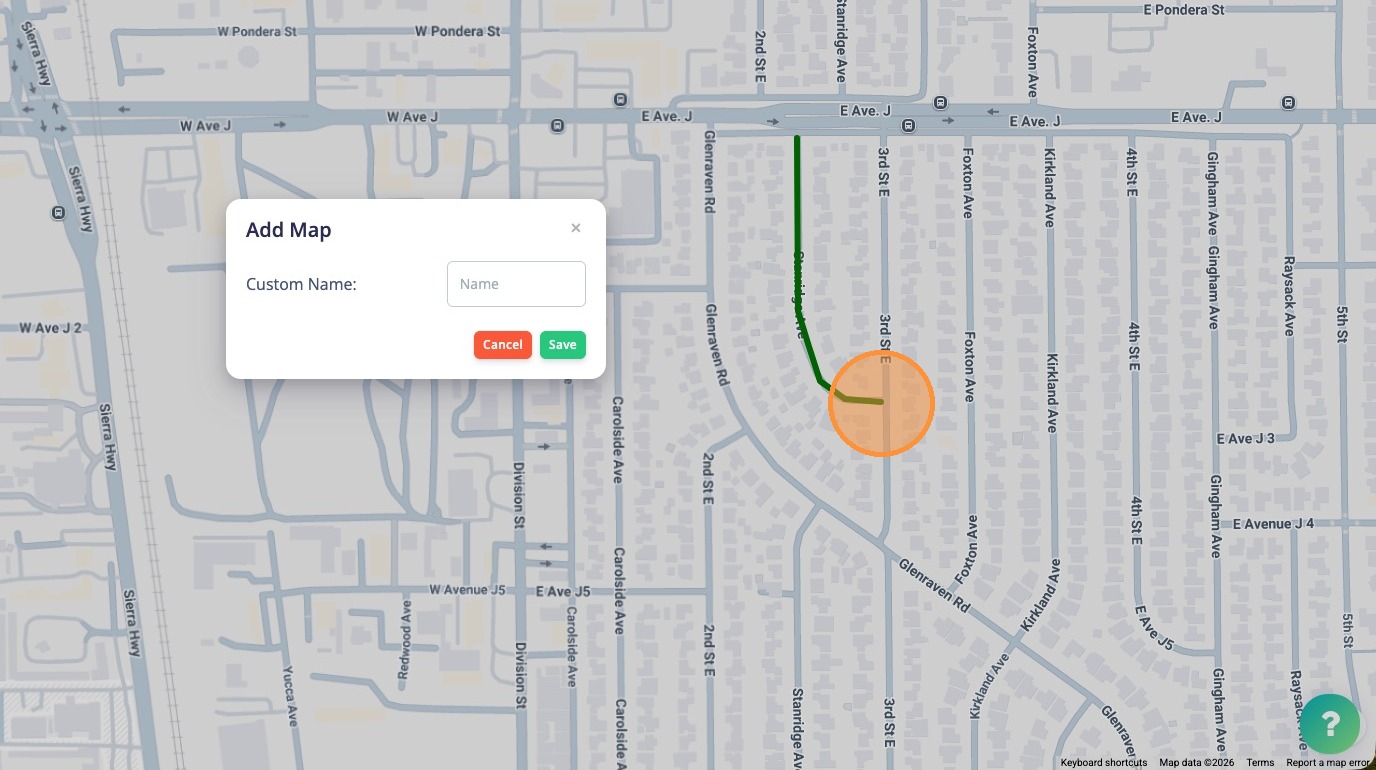
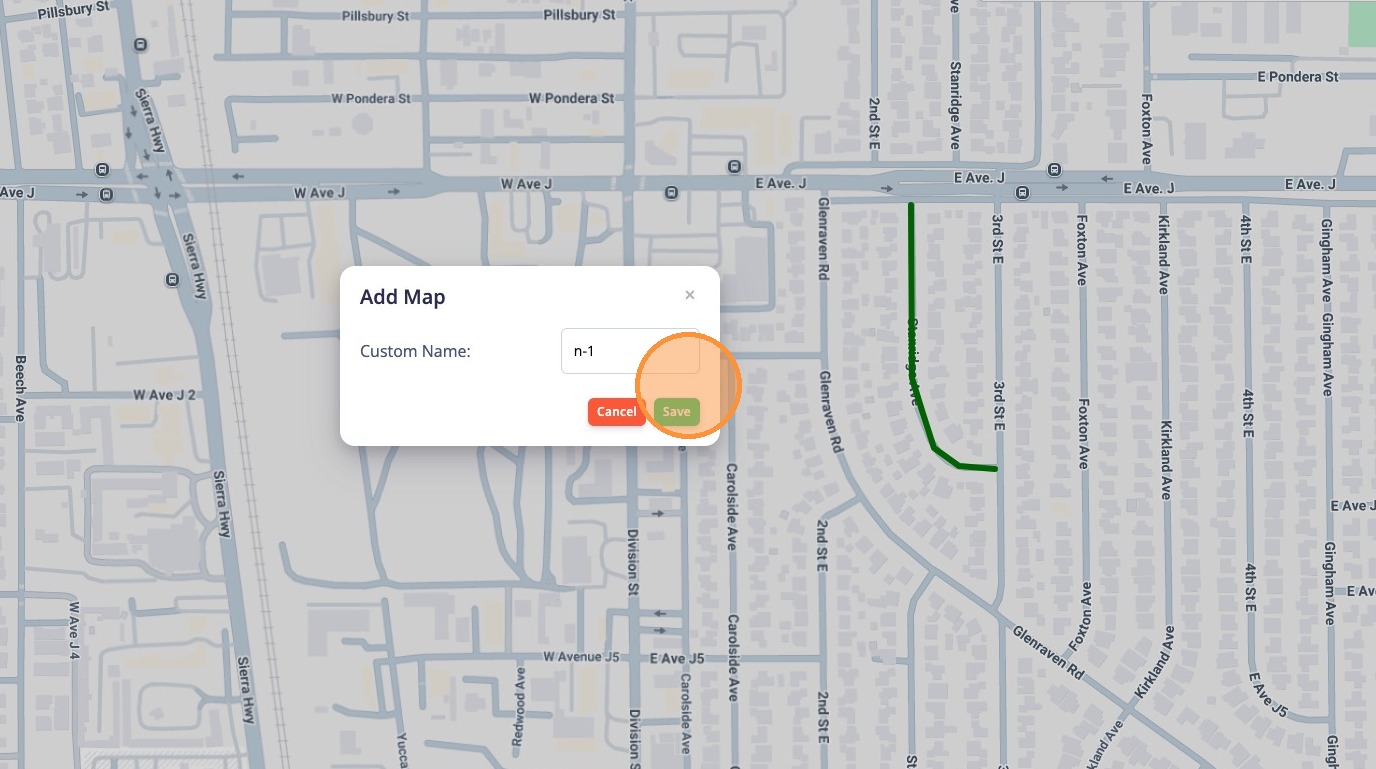
To complete the map, click a second time on the last anchor point. You will then be prompted to name the map.
Step 9: Name the Map
Name the map using a clear naming convention. In this example, we'll name it "N-1" for North Map 1, then hit the Save button.
Repeating the Process
Step 10: Keep Adding Maps
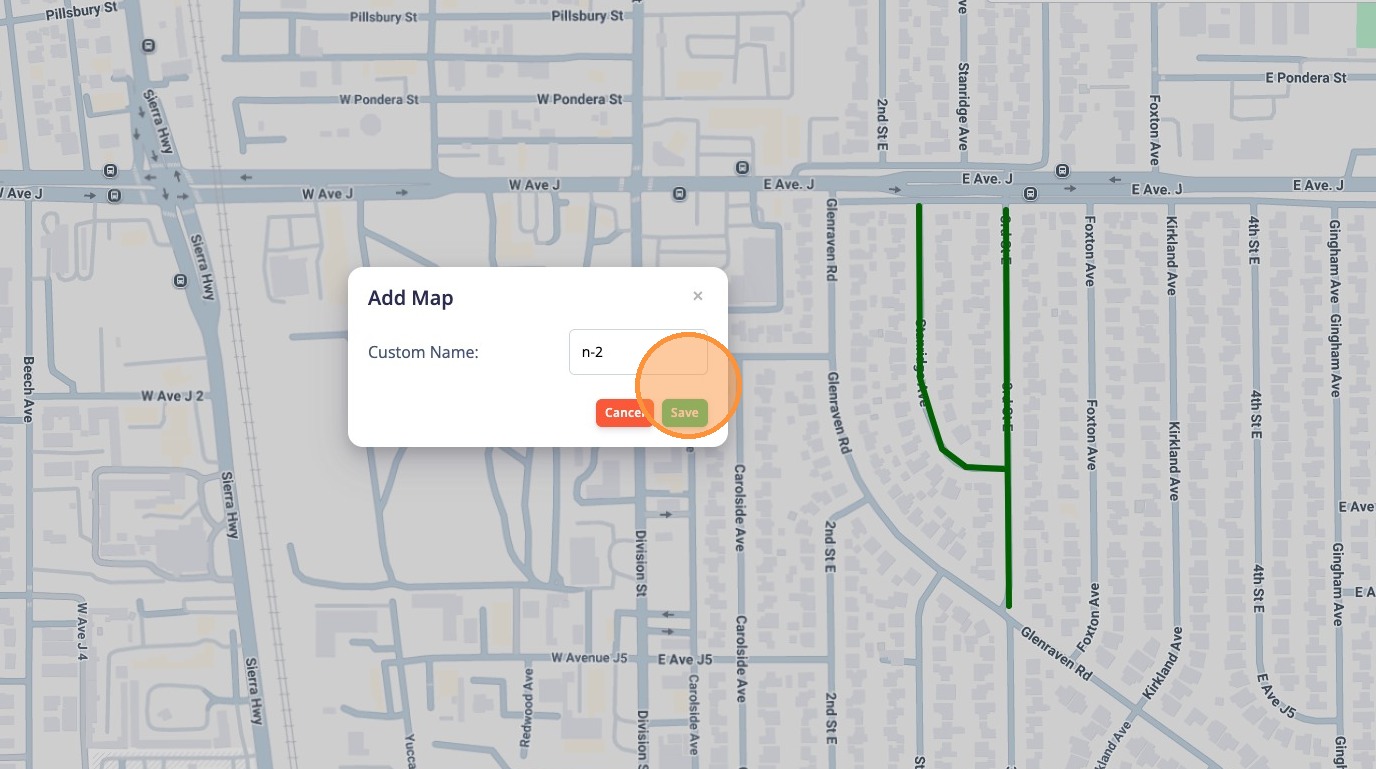
To continue making maps, just keep repeating the process — click Add a Map, draw the path, and save.

Step 11: Use a Naming System
Pick a naming system for the maps — typically in sequence based on the folder name. We'll name this one "N-2" for North Map 2 and save it.
Bonus Tip: Satellite View

Step 12: Switch Between Map Views
If you need to turn satellite view on, you can easily switch between satellite and the normal map view. This is helpful when you need to see buildings and houses more clearly while drawing your maps.
What's Next?
Now that you know the basics of creating maps, check out our more detailed guide on using SWAPP's outreach mapping software to learn about editing map boundaries, organizing folders, and utilizing maps during outreach.