Creating engaging church events is essential for fostering community and encouraging participation within your congregation. In this step-by-step guide, you’ll learn how to effortlessly set up events using the SWAPP platform, ensuring that every member is informed and excited to join in. By following these simple instructions, you'll not only streamline the event creation process but also enhance the overall experience for your attendees, making your church gatherings more impactful than ever!
Step-by-Step Tutorial
Step 1: Access Events and Add Event
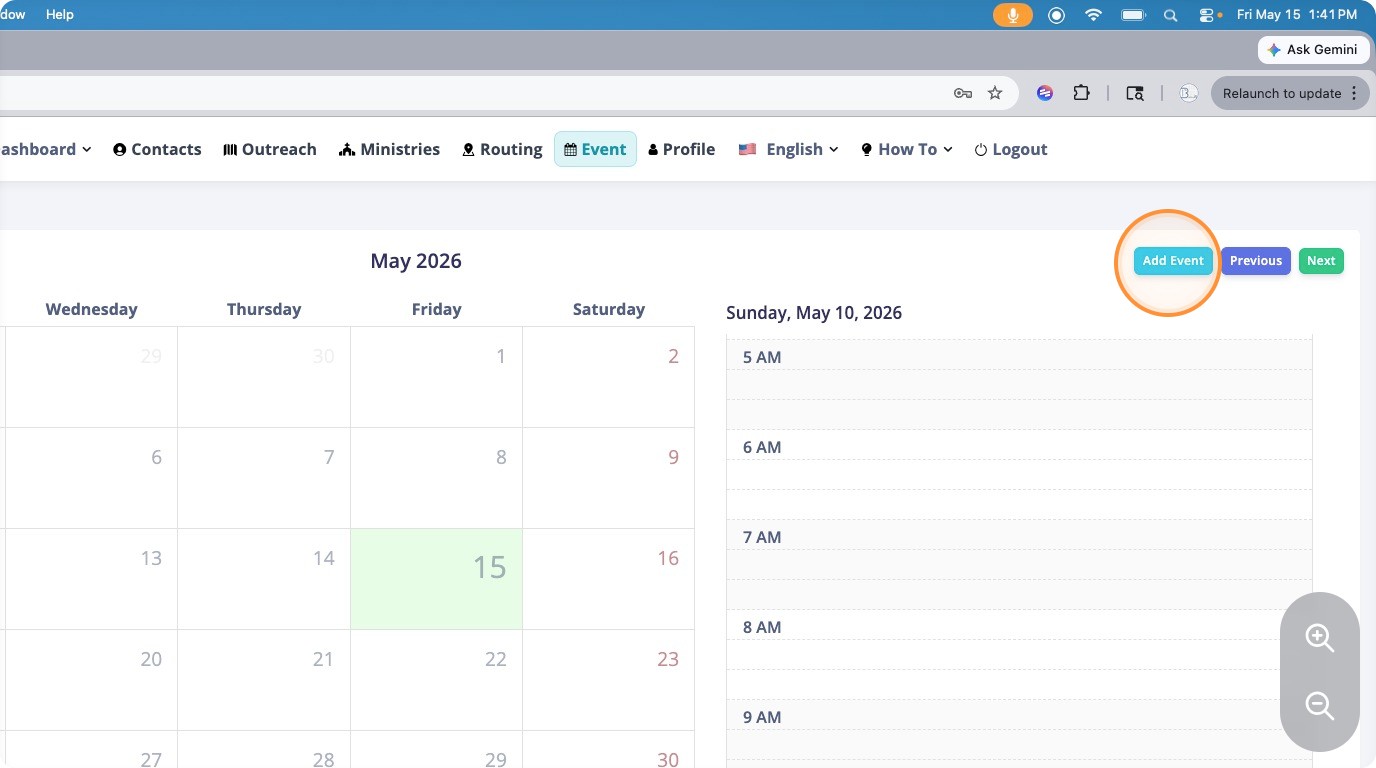
The first thing you need to do to create an event is go to the events tab on the top navigation bar and then click the add event button right here.
Step 2: Enter Event Details in Pop-up
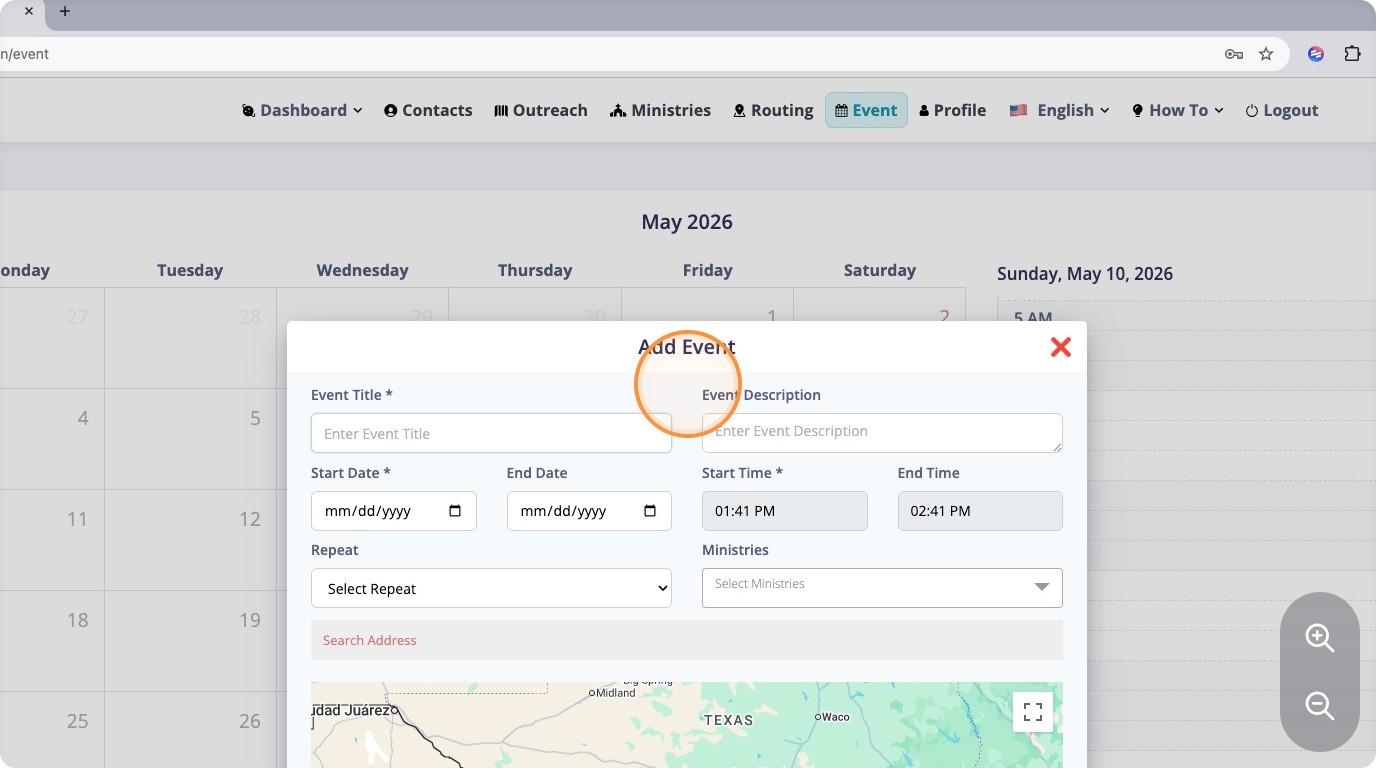
You'll be presented with a pop-up where you can fill out all the event details.
Step 3: Complete Event Details and Frequency
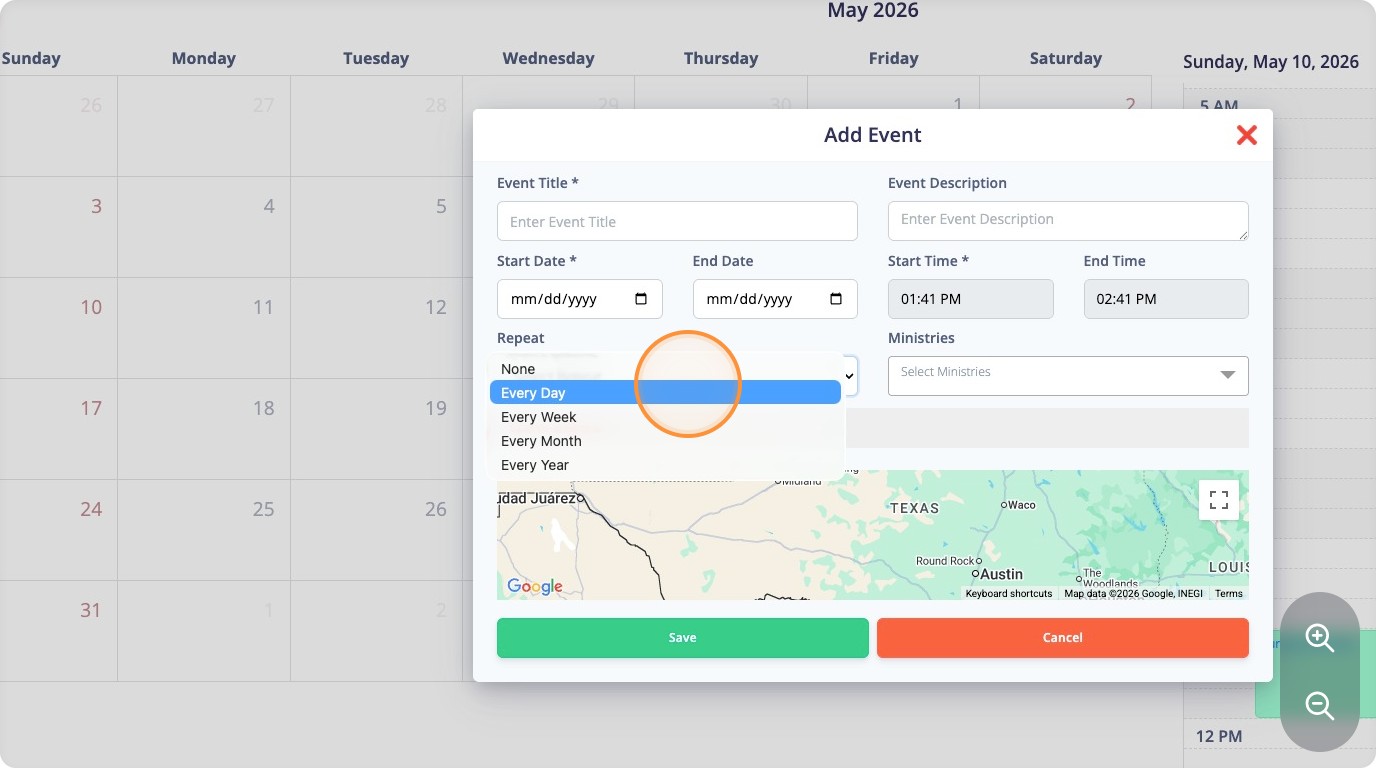
Make sure you fill out all the required details like the event title, the starting date and the starting time. If it is a repeat event like Sunday worship service that repeats every Sunday, set it to weekly. Or as often as it repeats.
Step 4: Name Your Event
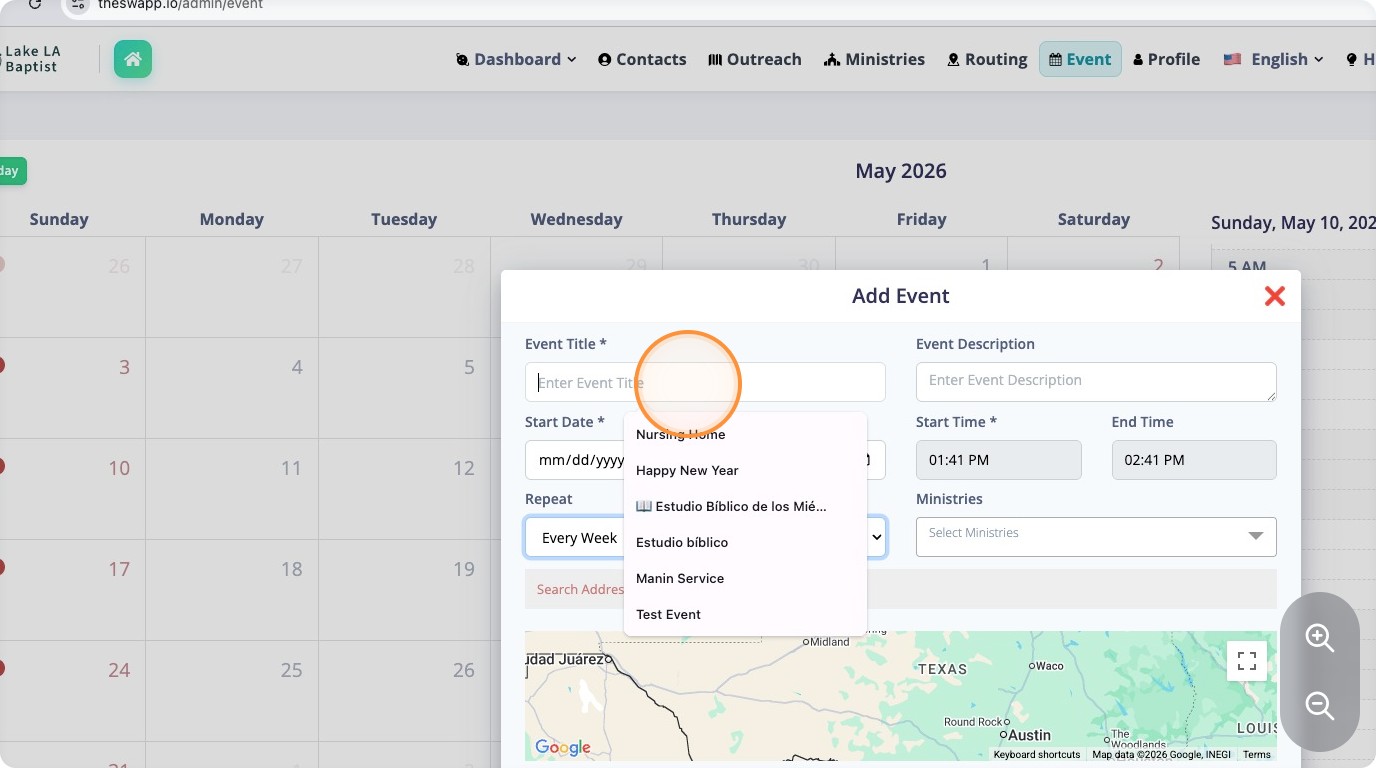
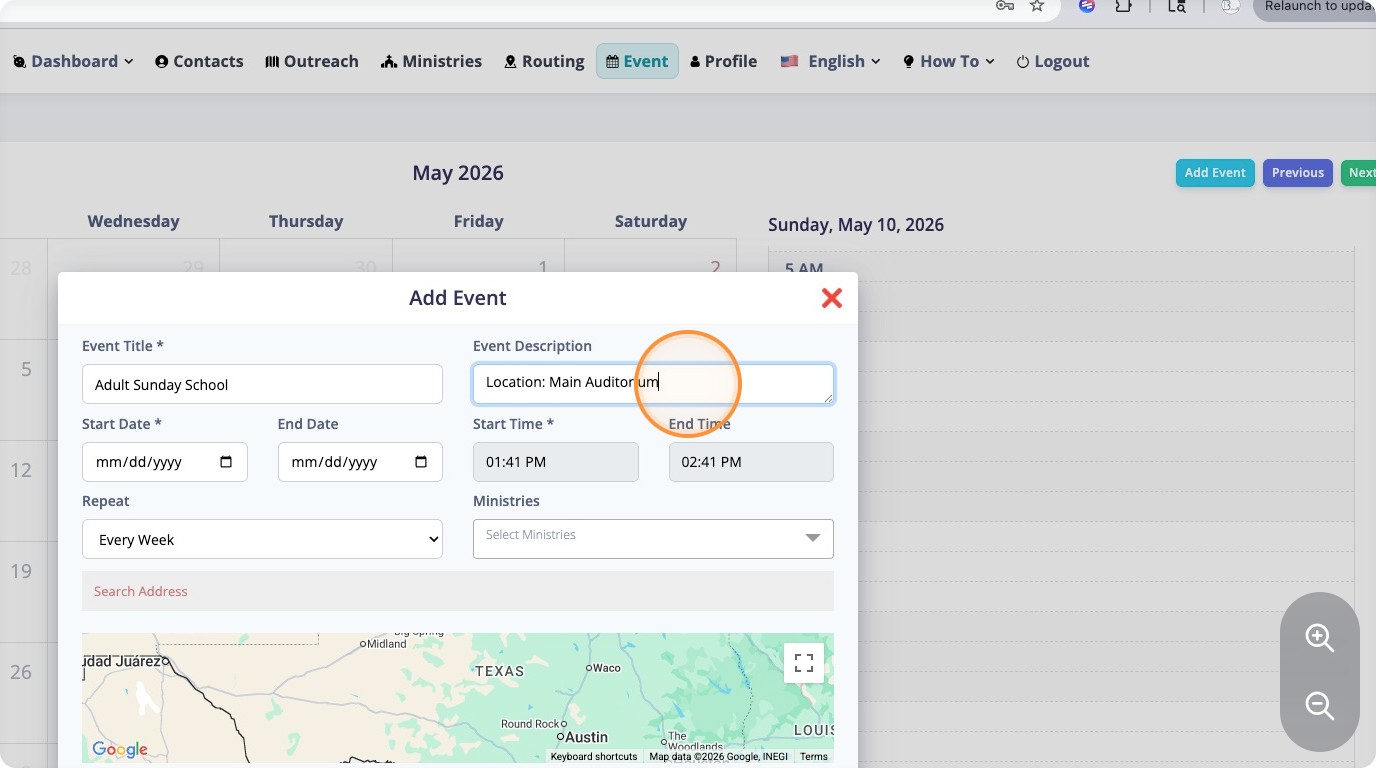
Give the Event a name. For Example Adult Sunday School.
Step 5: Add Event Description Details
Then Give the Event a description. Make sure to fill in details that would be helpful for the attendee to know. For Example things like the location inside the Building where the event meets, or the age group of the people etc.
Step 6: Set Event Start and End Times
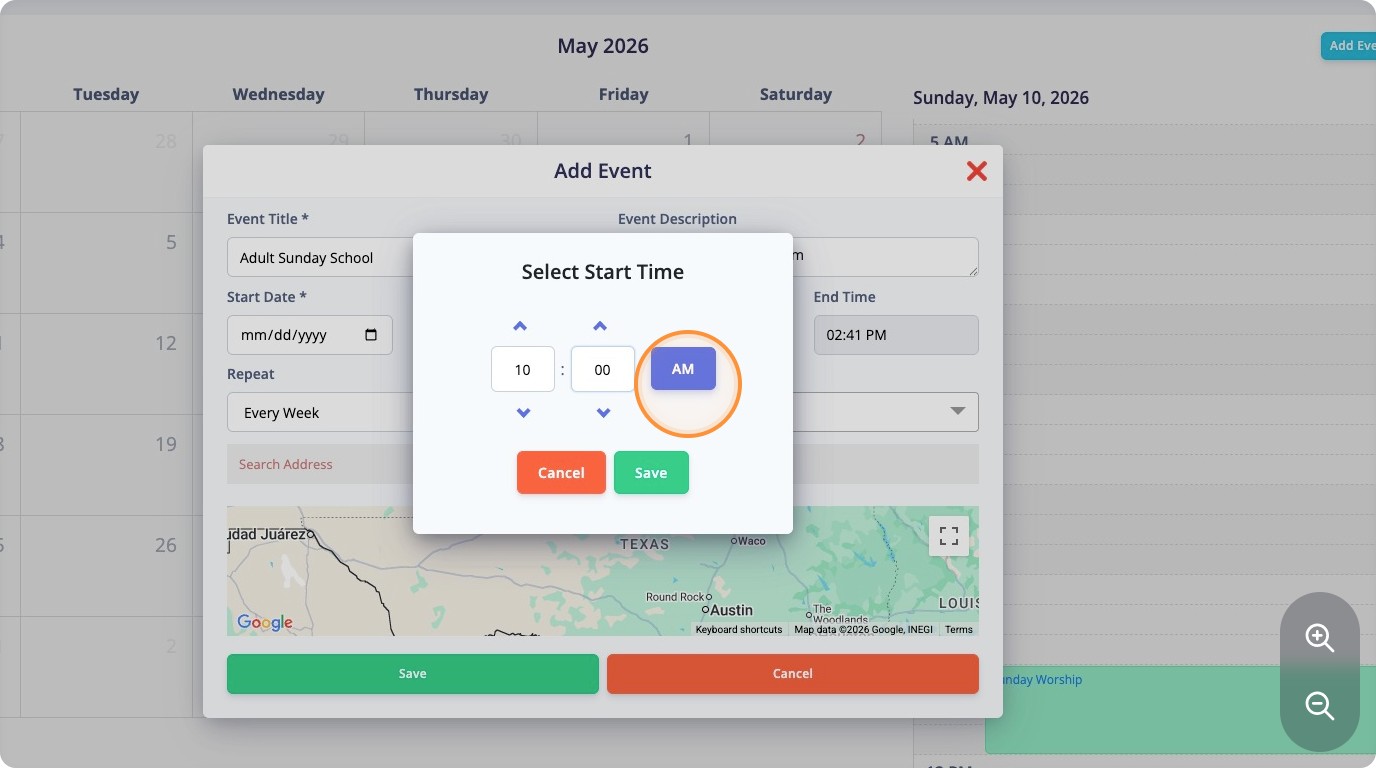
Give the event a start time and an end time. The end time defaults to 1 hour after the start time if you don't change it.
Step 7: Add Address or Location
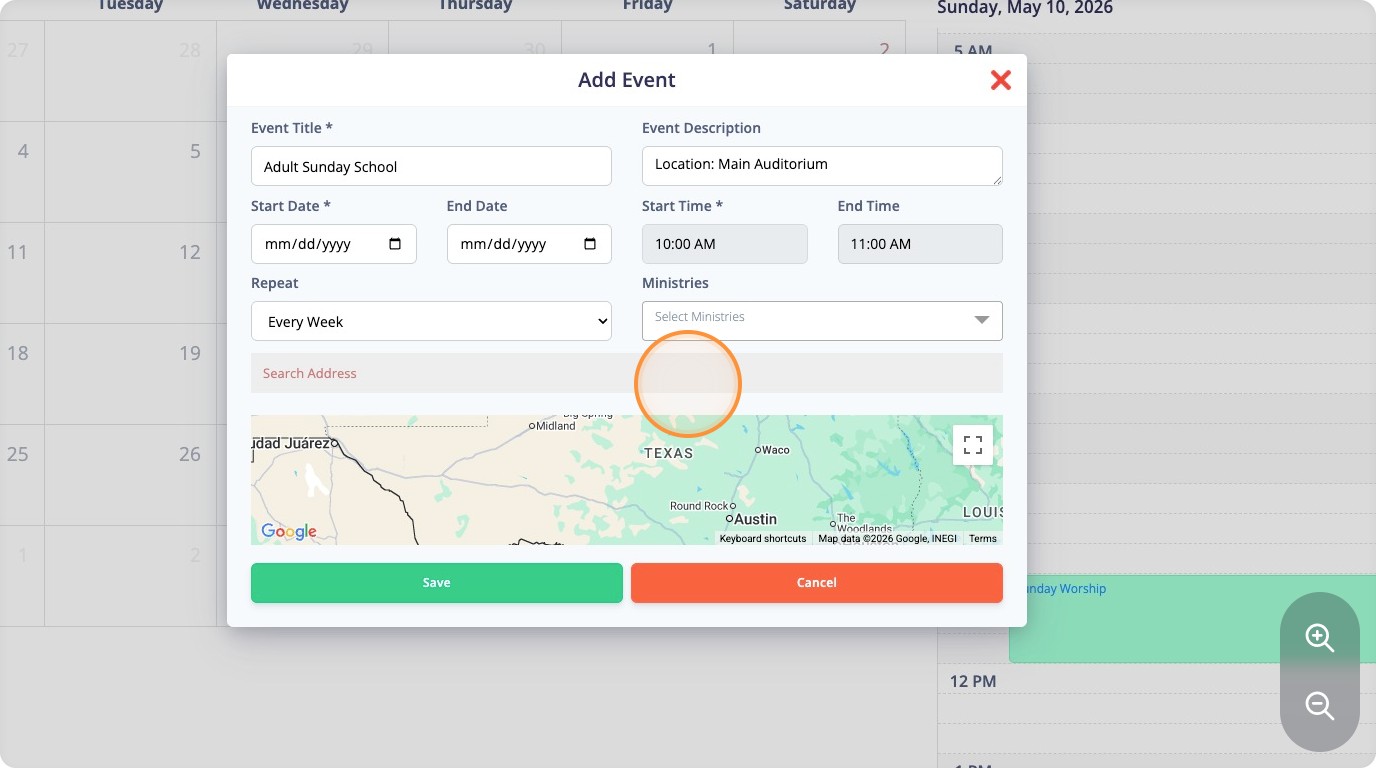
Include a address or location. Locations that show up on Google maps can also be searched instead of addresses.
What's Next?
Creating regular schedules for your church guaranteed higher involvement from both volunteers and community attendees. Now that you know how to build creating church events, check out our help center resources for more tips on managing your SWAPP custom church app!